Wednesday, July 23, 2008

Spring Tour- May 2-5, 2008

Spring Tour - May 2-5


Participants: Bob & Marcy Burhop, Pete & Lisa Ekstrom, Gordon Gluff, Joel Greenberg & Annie Luginbill, Larry Johnson & Sue L'Hommedieu, Len & Mary Keil, Larry & Karen Kelly, Joe & Sandy Kraatz, Pete & Marylu Kramer, Ed Levin & Rose Kovalenko, Jerry & Pat Peterson, Doug Rogers, Ken & Kathy Smizinski, Dan Tinder & Susan DeSantis, Len & Irene Vinyard, Bill & Liz Werth and Jim Wilson.

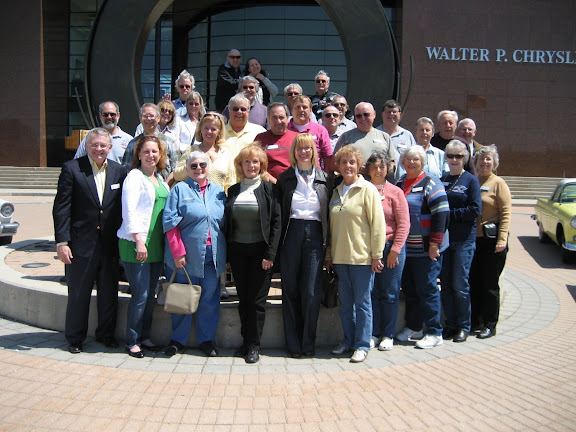
photo caption: The CTCC Spring Tour group gathers in front of the Walter P. Chrysler Museum. View more photos from the 2008 Spring Tour at the CTCC9.com Photos Page.

Despite the ominous weather forecast, 31 people, driving 13 little 'Birds, two new 'Birds and two regular cars, set out on Friday morning for Dearborn, MI to journey back to where it all began. A majority of us gathered at the Lincoln Oasis on I-294, and from there, were joined by others. Driving in and out of rain, our towels were put to use often. Along the way, Gordon's car lost power and he pulled off the highway followed by concerned helpers Joel & Annie and Bob & Marcy, who were driving the "chase car". Happily, it was a simple fix of a disconnected alternator wire.

We arrived in Marshall, MI hungry for an excellent lunch at Schuler's. Separated by a stoplight, half of the group got off course and gassed up at an alternate Citgo. After removing Doug's wire hubcap that had come loose, we used the radios and were able to easily reconnect with the front half of the caravan. The rest of the 300-mile journey was uneventful and, using alternate routing to avoid traffic congestion, we arrived at the Hilton Suites in Auburn Hills. It was determined that Bill's temperature gauge was not malfunctioning - his radiator cap inner seal was cracked which allowed 1.5 gallons of liquid to escape. Other problems during the weekend involved windows: Pete Kramer's driver side window got stuck and one of Ed Levin's windows cracked.

Ken & Kathy had arranged for us to use a hospitality room throughout the weekend. Len Keil presented Ken with a Yat Ming 1:18 scale die cast model of his car and Annie presented Kathy with two Micro Machine T'Birds. Annie also came with beautiful handmade necklaces for the ladies. Thank you Annie. Following cocktails, some of us ate a small dinner in the hotel's atrium while others ventured out for something different.

On Saturday, following a morning gas-up, we caravanned into Dearborn to "The Henry Ford," that consists of the Museum, Greenfield Village, IMAX and the Ford Rouge Factory Tour. Since it was rainy, most of us explored the Museum and availed ourselves of the Rouge (roozh) tour that included several theaters and a catwalk tour of the F-150 Truck assembly plant. Those who did visit Greenfield Village found it mobbed with children there to enjoy a "Day Out with Thomas the Tank Engine".

Saturday evening found us again in the Hospitality Room enjoying a CTCC sponsored pizza party. Ken and Bob picked up 15 pizzas from Pizza Hut, and they were quickly enjoyed by all. During the evening, Pete Ekstrom updated us about plans for the Fall Tour.

Sunday dawned bright and beautiful! The mud from the previous days was washed off the cars using the hotel's hose. The sparkling cars caravanned a short way to Meadow Brook Hall & Gardens, the fourth largest historic house-museum in the U.S. Built between 1926 and 1929 for Matilda Dodge Wilson (widow of auto pioneer John Dodge) and her second husband, lumber broker Alfred G. Wilson, the 110-room, 88,000-square-foot, Tudor-revival style mansion is filled with original art and furnishings. We were permitted to take pictures of the group and cars on the entrance circle before we toured the mansion and gardens.

Following a quick lunch at McDonald's, we drove to the Walter P. Chrysler Museum where we parked all of our Ford products on the courtyard. We learned the history of Chrysler vehicles, viewed films and saw many nicely restored vehicles.

Back at the hotel, people relaxed, swam or uploaded photos before gathering to caravan a short distance to Mountain Jack's Steakhouse. We enjoyed dinner in a semi-private area of the restaurant. Len Keil announced that July 19 is the date for the Second Annual Hot Dog & Drive In Movie Gala. Everyone thanked Ken and Kathy for planning and leading a terrific tour. Following dinner, everyone stopped by the Hospitality Room and received prints of the group photos which Liz had taken earlier in the day.

It was nice weather on Monday for our early departure from the hotel. It would not be an authentic CTCC Tour without a stop at Culver's for lunch, so we stopped in Stevensville, MI and took over about half of the restaurant. We said our final, in person, goodbyes and headed for home. We did have a quick stop on the side of the highway because Ken lost his wire hubcap. He retrieved it and happily it was not too damaged. Radioed goodbyes were transmitted along the way home.


-- Liz Werth

Picnic- 2008

Classic Thunderbird Club of Chicagoland
ANNUAL 'ALL-MEMBER' SUMMER PICNIC
(for CTCC member, spouse/significant other and minor children)

Date: AUGUST 16, 2008 - Time: 11:00 am

Pratt's Wayne Woods Forest Preserve

The preserve is located in Wayne, IL in Northwest DuPage County
west of Route 59, one mile north of Army Trail Road on Powis Road.
Follow the signs to the CTCC Thunderbird parking area.
For maps and information visit the website http://www.dupageforest.com/PRESERVES/prattswayne.html

What to Bring
A dish to share (see below*) & serving utensil
Lawn chairs for sitting outside the pavilion
Fishing poles (see requirements in Bird News)
Sun Screen
Lawn game (volleyball, badminton, frisbee, etc.)

What NOT to Bring
Alcohol of any kind
Firearms
Swimming gear (there is no swimming)
Pets
Bad weather


R. S. V. P. by Saturday. August 9
Call Jane Eisenhour (630-584-8383)
* tell her which dish you will bring to share - a side dish, a salad or a dessert

Thursday, July 17, 2008

Hot Dog and Drive In Movie

Classic Thunderbird Club of Chicagoland
Second Annual
Hot Dog & Drive-In Movie Gala

July 19, 2008 4:00 pm-?

Join us for a day of fine food, hot dogs & brats. Bring your appetite. Following dinner we will be traveling to the McHenry Drive-In Theater for a night at the movies. When was the last time you were at a drive-in? Bring your lawn chairs; T-Birds, as we all know, can be a little uncomfortable. Show starts at 9:OO pm. T-Birders who don't want to go to the drive-in are urged to just join us for the dogs & brats.

Len & Mary Keil 815-759-8763
RSVP before July 12, 2008
Gala will be held rain or shine!

DIRECTIONS
RT. 31 two miles north of RT. 120, look for a Remington Grove
sign, on left, Alexander Dr., Turn left into development, there is
a left turn lane. Proceed on Alexander past models to Jay St.
Immediately past models, turn left to 4211. Call Len for more
detailed directions. Area is not on mapquest.

2008 Fall Tour Update

UPDATE ON CTCC ANNUAL FALL TOUR:

The Uplands of Southwest Wisconsin ~ October 3-5th, 2008. We will meet at the Belvidere Oasis on Friday Morning at 10:00 AM on Oct. 3rd. Our tour will take us to several unique towns just south and west of Madison, Wisc. We will stay in Verona at the Holiday Inn Express, which opened Memorial Day weekend.

ATTRACTIONS:
Cave of the Mounds
Little Norway
House on the Rock (photo of Infinity Room pictured)
Mt. Horeb Heritage Festival
Mustard Museum

Our 'Birds will be featured on Main St. at the Largest Event of the Year in Mt. Horeb.

Please make your reservation at the Holiday Inn, by Sept.1st, 2008.
Phone: 1-608-497-4500 ;
$109.00 per nite or $129.00 for a suite. Breakfast included.
Be sure to mention the Chicago Classic Thunderbird Club.

Total mileage from starting point will be less than 200 miles over 5-days.
If you have any questions please call the Ekstroms at 630-681-1069.

-- Lisa Ekstrom

Saturday, July 12, 2008

Editor's Notebook- June 2008

the editor's NOTEbook

BERT EISENHOUR

THE CTCC CALENDAR [PAGE 2] NOW INCLUDES THE DATE FOR THE 2ND ANNUAL SATURDAY NIGHT AT THE DRIVE-IN. Preview information is presented on page 10, with complete details to appear in the July issue of BIRD-NEWS.
Mark the date - Saturday, July 19th - on your CTCC calendar.

Page 10 also outlines preliminary plans for the Fall Tour, which is being designed by the Ekstroms. Since our club has not visited this scenic area for a number of years, it is a not-to-be missed Tour!

Thanks to Liz and Bill Werth, we have comprehensive coverage of the Spring Tour - pages 6-8, including 2-photo pages and an interesting view of the classic T-Birds that appears at the top of page 9.

Sadly, we record the passing of Chuck Maddox III [page 4] whose family enjoyed many years of membership in CTCC, starting in the early 70s. Chuck's interest in things T-Bird was never-ending....

Don't forget to join us at the Membership Meeting; Russell's BBQ on June 12th! Great BBQ's.

48 in 08- July 10th update

The 48 in 08 tour is in countdown mode! For the most recent information, read on ....

1. Caravan communications: We will be using two-way radios on Channel 7, Interference Code 1, as long as there isn't a lot of outside chatter; if there is chatter, we'll try one channel up or down.

2. Phone communications: If you need to contact us by phone, please call Doc's cell phone, 650-759-4302. If Doc is driving, his navigator, Paul Lynch, will answer.

3. E-mail communications: Please send all e-mail to http://us.f834.mail.yahoo.com/ym/Compose?To=48in08@earthlink.net. Lucy is taking a laptop computer and will check e-mail as time and Internet connections permit.

4. Capitol photos: Photos will be taken in the evening in Sacramento on Thursday, July 24, and in Carson City on Friday, July 25.

5. Reservations: If you plan to meet us in Sacramento and/or Carson City, please be sure you have notified Doc. We need a final count of the number of T-Birds and people for both locations. (See July Newsletter on website for details.)

6. Convention: The 48 in 08 tour will have an un-manned table at the convention. Stop by to see samples of the caps/shirts and order forms; if you order during the convention, your order will be shipped to your home -- in time for our arrival in your home state! The 'By the Time I Get to Phoenix' entry forms will also be there, plus McPherson College literature. We also want to take a photo of the 48 in 08 participants at the convention - probably before or after the awards banquet.

7. Publicity: Doc, the Chick Magnet and 48 in 08 are on the cover of the July issue of Northern & Central California's "Cruisin' News". A nice article about the tour and CTCI inside.

8. Friends: CASCO has been added to the list of Friends for the tour.

9. Newsletter: The July Newsletter is on the website and will be continually updated until we start the tour.

10. Journal and Photos: To keep track of the tour's progress, check the Journal and Tour Photos sections on our website. It will be updated as time permits.

We are looking forward to seeing many of you in Portland and/or on the road.


Lucy Clark, CTCI # 26656, home phone 714-630-4066
Doc Dockter, CTCI # 33331, Cell 650-759-4302

48 in 08 Tour information at http://www.home.earthlink.net/~48in08

Tech Tip: Fuel Filter Replacement

Your Thunderbird is equipped with a fuel filter. Its purpose is to trap any impurities in the gas which would clog your carburetor if they were allowed to reach it. The fuel filter for your Thunderbird is located inside a glass bowl which is positioned in your fuel line directly above your fuel pump. The fuel pump and filter are located on the driver's side of the engine compartment at the front of the engine. To insure that your car's fuel system is working properly, it is important to make sure that you change your fuel filter with some regularity. You do not need to change it as often as your oil filter, but if you don't remember when you last changed your fuel filter I it's probably time to change it.

When changing your fuel filter you will be working with gasoline. Please use caution!!

The following tip is intended to make changing the fuel filter easier and also aid in reducing the chances of creating a gas leak due to an improper fit of the filter gasket.

The first step is to make sure that your car is on level ground and not running. Make sure you have a new fuel filter and also the rubber gasket for the glass bowl. The gasket should come with the new fuel filter. Now find the glass bowl. The glass bowl is held in place by a wire harness with a wing nut at its base. By loosening the wing nut at the base of the glass bowl, you can push the wire harness over to one side and remove the glass bowl from the fuel filter housing. Be careful to catch any gas that may spill. Next, loosen the two brass gas line fittings which connect the fuel filter housing on both sides to the fuel lines. You will need a 1/2" and 9/16" wrench. Loosen the 1/2" fittings enough to allow you to swing the filter housing upside down so that the fuel filter element will be facing up, directly at you. Once you have rotated the filter housing, remove the fuel filter. If your gasket did not come off when you removed your glass bowl, remove the old gasket now. Install the new gasket being careful not to fold or kink it. Make sure it fits evenly in the recessed channel of the filter housing. Next install your new fuel filter. Your old filter should have been installed with the paper side towards the fuel filter housing. Make sure your new filter is installed the same way. Reinstall the glass bowl and place the wire harness back in its original position around the glass bowl. Tighten up the wing nut so that the glass bowl fits snugly into the fuel filter housing. Make sure your gasket did not shift out of the channel in the filter housing. Once you are satisfied that all is well, turn the filter housing, with the glass bowl attached, back into its original position so that the glass bowl is underneath the filter housing. Now retighten the brass gas line fittings on both sides. Start your car up and check for leaks.

This tip is simple, but for all of you out there, myself included, who tried to change the fuel filter without rotating the housing, it sure makes the job easier!

Source: CTCC Tech-Tip Manual 1993-1997

Tech Tip: Vacuum Advance

The vacuum advance mechanism for your 1955-57 Thunderbird is located on the outside of your distributor. It is a metal circular disk-shaped housing which is attached to the distributor directly below the distributor cap. On 1955 and 1957 models, there will be one metal vacuum line which attaches to the vacuum advance. On 1956 Thunderbirds there is a dual vacuum advance mechanism and thus there are two vacuum lines attached to the vacuum advance. A vacuum advance that is not working properly will make your car run rough at idle and give you poor overall performance. If you did not check your vacuum advance when you gave your car its last tune up, then this tip is for you.


To test to see if your vacuum advance is working, you can use a vacuum gauge, if you have one, or you can do the following procedure. You will need to remove the vacuum advance from the distributor. First, disconnect the vacuum line leading into the vacuum advance. For 1956 owners, there will be two vacuum lines to disconnect. Next, remove the distributor cap and rotor. There will be two screws which hold the vacuum advance to the distributor. Remove the screws. On 1955 and 1956 Thunderbirds, there will be a metal rod which comes from the vacuum advance and attaches to the underside of the distributor plate. There will either be a small wire cotter pin or "c" clamp holding the end of the vacuum advance metal rod up through a small hole in the distributor plate. On 1957 models, there will be a flat metal rod which is attached to a metal nub on the topside of the distributor plate. I t is also held in place by a small "c" clamp. Remove the pin or clamp and you can pull the entire vacuum advance mechanism away from the distributor.

Once you have removed the vacuum advance, use your mouth and try to suck the air out of the vacuum advance mechanism via the hole where the vacuum line was disconnected. It helps to clean this area of the mechanism before attempting this procedure. If the vacuum advance holds the vacuum, then your mechanism is working properly. You can tell if the vacuum advance is holding the vacuum by placing your finger over the hole before you remove it from your mouth. If the skin of your finger is pulled into the hole opening by the suction of the vacuum, then your vacuum advance is holding a vacuum. On 1956 vacuum advances, make sure you place a finger over one of the holes throughout this procedure.

If you have discovered that your vacuum advance is not working, and your car is a 1955-56 Thunderbird, simply install a new vacuum advance reversing the above procedure for removal. For 1957 owners, however, you must first disassemble part of your old vacuum advance. On the 1957 vacuum advance, there will be a cap at the end of the vacuum advance where the vacuum line is attached. Unscrew this cap. Inside will be an arrangement of washers and a spring. Remove the washers and spring taking note of their order of disassembly. These parts must be installed in your new vacuum advance in the same fashion as they were installed in your old vacuum advance. Once you have "reassembled" your new vacuum advance, you can install it in the same manner as the 1955 and 1956 vacuum advances. Just reverse the removal steps outlined above. Once reassembled, check and adjust your timing, if necessary. Your car should now run much better.

source: CTCC Tech-Tip Manual 1993-1997

Tech Tip: Telescoping Steering Column

It might come as a surprise to some Classic Thunderbird owners that their 1955-57 Thunderbirds came equipped with a "telescoping" steering column. Yes, that steering wheel which has progressively inched up closer to the driver's seat each year and made you feel as if you might have gained a few extra pounds over the winter actually can be moved up or down on the column. With proper adjustment, you can adjust your steering wheel to accommodate your individual physical needs, within set engineering tolerances.

Your steering wheel can be moved by loosening the chrome sleeve located directly behind the steering wheel. The chrome sleeve has numerous grooves which run parallel with the steering column. By turning the sleeve in a clockwise direction, you will loosen the sleeve. Once the sleeve is loose, you can adjust your steering wheel, up or down, by pulling or pushing on the steering wheel. Be careful not to pull the steering wheel out of the steering column. There should be a stop which prevents you from pulling the steering wheel completely out of the column. My car, however, must have lost the stop during a prior restoration. I pulled the steering wheel out of the column with one strong pull. I was able to place it back in the column, but once the steering wheel is out of the column you run the risk of damaging the wires which run up into the steering column. Once you have adjusted your steering wheel, simply retighten the chrome sleeve. Your steering wheel should stay in its new desired position.

The above procedure sounds simple, and it is. The problem lies in the chrome sleeve that you are supposed to be able to loosen with a simple clockwise twist. Over the years, the threads on the steering column usually become clogged with dirt and road grime. Exposure to water in the form of dew, humidity, or the inevitable summer downpour, creates rust on the metal threads. The result is a seized steering column sleeve. Just ask any bruised knuckle on your hand how easy it is to loosen a seized nut from a rusted, dirty threaded bolt. The analogy is appropriate, except you can't apply a blow torch or hacksaw to your steering column sleeve. You can, however, do the following.

First, apply some WD-40 or other spray lubricant to the steering column sleeve. Spray the lubricant between the sleeve and the steering column. You should wait approximately twenty-four hours before attempting to loosen the sleeve. This will allow time for the lubricant to penetrate the threads. Be sure to clean up any overspray or drips immediately. You may want to wrap the area with rags to catch any drops. If you're lucky, this may be all you need to do.

If lubricant alone is not enough to loosen the sleeve, you will be forced to use physical force. The perfect tool to use to loosen your steering column sleeve is a large chain wrench. This tool is available at most hardware stores and should cost approximately $20.00 to $25.00. As an alternative, a trusty pipe wrench will work. Make sure it is at least fourteen inches or larger. Before using either of these tools, make sure you wrap the steering column sleeve with a good rag.

As a last resort you can use a 1" x 2" block of wood and a hammer. First, place the block of wood so its edge lies in one of the sleeve grooves. You should choose a groove that is easily accessible. By tapping on the block of wood with your hammer you should be able to free the seized sleeve. Remember to turn the sleeve clockwise. You should only need to use moderate force. Just be careful! One false move could mean a chip, dent, or sore thumb.

source: CTCC Tech-Tip Manual 1993-1997